ipinnedit

My blog details all the fantastic "pins" I've actually made! Enjoy!

Ice Cube Tray to Freeze Cookie Dough November 12, 2012

I love to bake cookies!  There is nothing better than a freshly baked warm chocolate chip cookie with a glass of milk.  The problem I have with making homemade cookies is that the recipe yields dozens of cookies that I don’t really want to eat up in just a few days.  I’m not a huge fan of cookies that are a few days old.  They just don’t have the same fresh flavor!


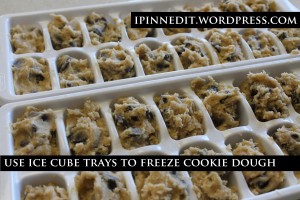
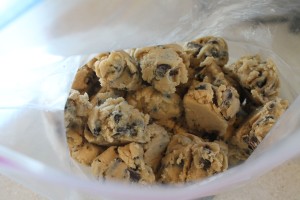
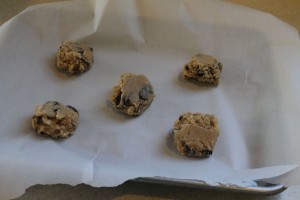
I found a way to make a batch of homemade cookies last much longer!  I saw a pin on Pinterest that gave me the idea to freeze cookie dough in an ice cube tray.  I baked a few sheets of cookies and then spooned the rest of the cookie dough into an ice cube tray or two.  I let the dough freeze for a few hours and then placed the frozen cubes in a ziploc bag.  I stored the bag of cookie dough in the freezer.  Now, when my family is craving cookies, I already have the dough ready to go.  I just added a minute or two to the baking time since the dough was frozen.  I’m very pleased with the results of this experiment!


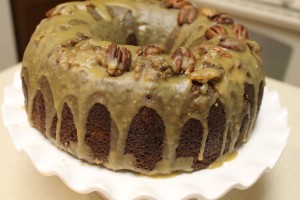
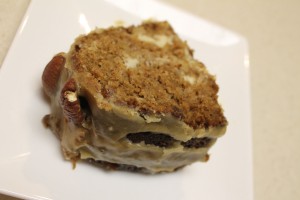
Apple Cream Cheese Bundt Cake with Caramel Pecan Frosting November 5, 2012

This was probably the BEST cake I’ve ever made.  I will make this again and again and again.  Growing up, my mom made spice cake often.  It was a family favorite.  Well, this cake reminded me of souped up spice cake!  Don’t skip the pecan topping, it really made the cake!  This would be the perfect dessert for Thanksgiving.  It was great with a cup of coffee for breakfast, too!  🙂


Recipe http://www.jamhands.net/2012/09/apple-and-cream-cheese-bundt-cake-with.html

Time:  It took half the day to complete this cake.  As far as prep work, dicing up the apples was the most time-consuming part.  Other than that, the baking and cooling times were long, too.  It was worth it though!

Substitutions:  I baked mine for one hour.  The recipe says to let the cake cool for 15 minutes and then remove the cake from the pan.  I had to wait much longer (an hour) and I still ended up losing some of the cake.  Ugh!  Also, the recipe shows a thick white icing on top of the cake.  The icing actually attracted me to the recipe; however, my icing was more of a glaze.  It didn’t matter because it was so delicious!!!


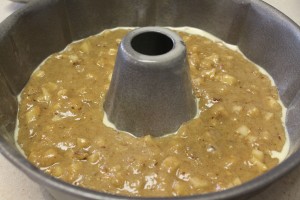
Batter poured into pan. The white you see around the edge, is the “Bake Easy” spray I used to coat the pan.

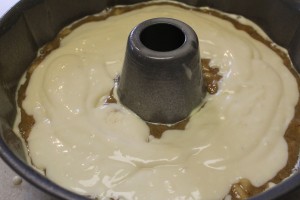
I added the cream cheese mixture. As you can see, I couldn’t keep it an inch away from the sides as instructed in the recipe.

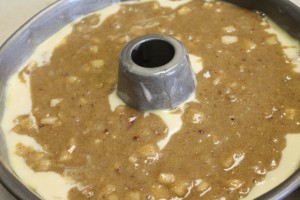
I added the remaining apple batter.

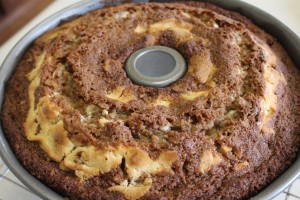
Baked!

Finished cake!

Ready to eat!


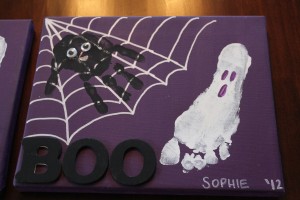
DIY Halloween Spider Hand Print and Ghost Foot Print Canvas October 30, 2012

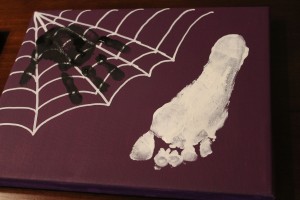
A friend of mine created some Halloween canvas art using her son’s hand print and foot print.  I’ve seen this project posted on Pinterest, too.  She did two separate pieces of art (one hand print spider and one foot print ghost).  Since I only had one canvas per child, I decided to combine the spider and ghost on one canvas.


Supplies

1.)  Canvas – any size that will fit a hand print and a foot print.

2.)  Acrylic paint – I used purple for the background, white for the ghost, and black for the spider.

3.)  White paint pen.

4.)  Paint brushes.

5.)  Googly eyes.

6.)  Glue

7.)  Wooden letters – optional.


Steps

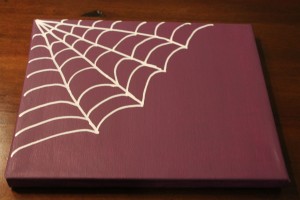
1.)  Paint your canvas in any color you like.  I chose a deep purple.  I ended up doing 6 layers of paint to get a good background.


2.)    Draw a spider web using the white paint pen.


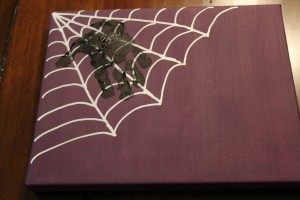
3.)  Using a foam paint brush, paint your child’s hand black and stamp it on top of the spider web.  Make sure to paint on a good thick layer of paint and stamp immediately for best results.  It’s helpful to have a second adult on hand to quickly whisk away your child to clean off their hands and feet.


4.)  Using a foam paint brush, paint your child’s foot white and stamp it on the canvas.


5.)  Allow time for the ghost and spider to dry.

6.)  Glue googly eyes on the spider and paint on a mouth.

7.)  Paint eyes and a mouth on the ghost.  I used purple, but black would look good, too.

8.)  Personalize the artwork by writing your child’s name and year at the bottom.

9.)  Use a paint pen to write “BOO” or “EEK” somewhere on the canvas.  I didn’t trust my handwriting, so I painted some wooden letters black and glued them on.


October Date – Paint by Numbers October 22, 2012

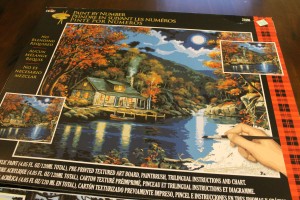
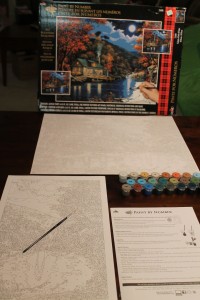
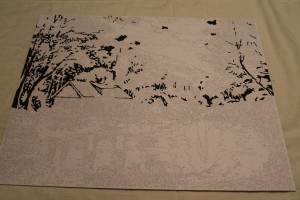
I put together one year’s worth of dates (one date per month) for my husband as a Valentine’s Day present.  I’ve always wanted to do a paint-by numbers painting.  My husband is great at drawing.  I’m not such a great drawer, but I thought it would be fun to give this a shot!  Our date was relaxing!  I purchased two paint by numbers kits for us to paint.  We painted while listening to music.  We also enjoyed a bottle of sparkling wine that we purchased during a recent trip to Napa Valley!


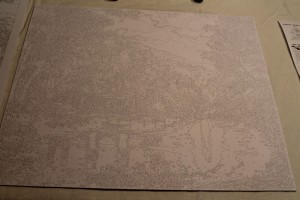
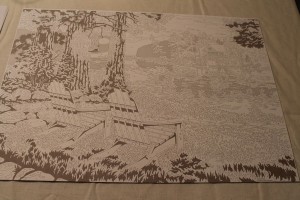
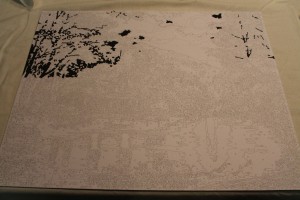
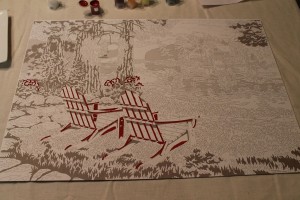
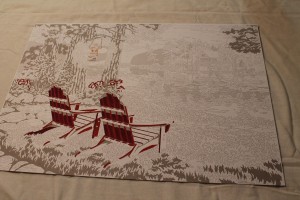
The date card read “This will be a low key date at home.  We’ll drink wine and paint by numbers.  Love, Lisa.”  We worked on our paintings after the girls went to bed.  We WAY underestimated the amount of time it would take.  Take a look at what we accomplished after 2 hours (see photos below).  I have 22 different paint colors in my kit and I only finished 1/3 of one color in 2 hours!  Yikes!  I guess this will be the gift that keeps giving.  It might take a year, but we will get these done!

My Painting

Hubby’s Painting


Kit Includes – Canvas, Paint Brush, Paint, Instructions

Sparkling Wine

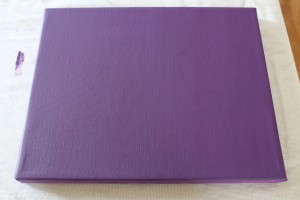
My Blank Canvas

Hubby’s Blank Canvas

My Painting – 2 Hours of Work

My Painting – 4 Hours of Work


Hubby’s Painting – 2 Hours of Work

Hubby’s Painting – 4 Hours of Work


Until next month…


Check out our previous dates…

September 2012 – due to a busy September, (birthdays, trip to Denver, etc.) we will be going on this date at the end of October (if my 2 year old will start sleeping again and I can leave her with a sitter).

August 2012

July 2012

June 2012

May 2012

April 2012

February 2012


Hand Print Spider Halloween Craft October 19, 2012

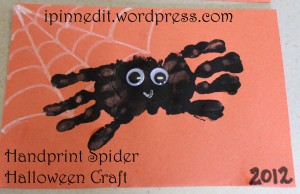
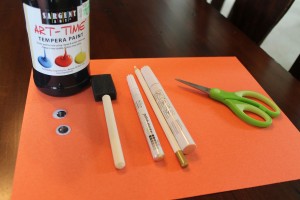
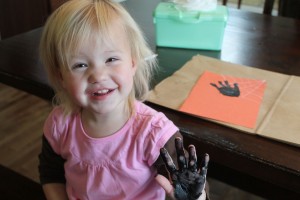
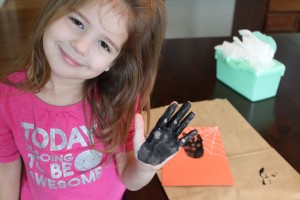
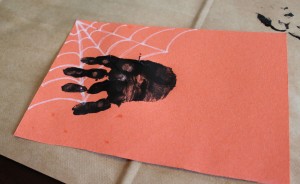
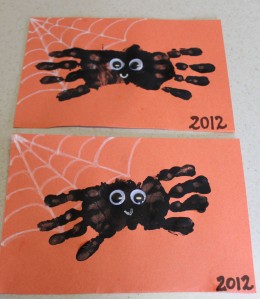
My daughter’s preschool class is having a Halloween party and I’m in charge of coordinating one craft for the party.  I searched Pinterest for some cute ideas and decided on this adorable hand print spider.  I decided to try it out before the party.  The girls enjoyed getting a little dirty.  I’d recommend rolling up the sleeves and having a bunch of baby wipes on hand for the mess!  For the party, I went ahead and cut all the paper, drew the spider webs, and wrote in the year.  All the kids will have to do at the party is stamp their hand prints and add the googly eyes.


Supplies

1.)  Orange construction paper.

2.)  Scissors or paper cutter.

3.)  White colored pencil, crayon, or paint marker.

4.)  Black paint.

5.)  Sponge paint brush.

6.)  Googly eyes.

7.)  Glue.


Steps

1.)  Cut a piece of construction paper in half.


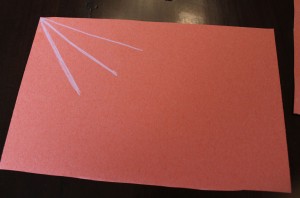
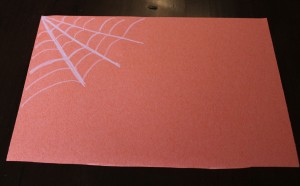
2.)  Using a white writing tool, (I used a colored pencil) draw a spider web.


3.)  Cover your child’s hand in black paint (do not paint the thumb).


4.)  Carefully place your child’s hand on the paper, partially covering the web.


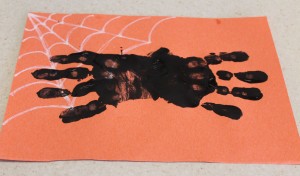
5.)  Repeat with the other hand.  When you stamp the second hand, overlap part of the palm.


6.)  Glue two googly eyes on the spider.


7.)  Once the black paint has dried a bit, you can draw on a smiley face.


8.)  Add the year and your child’s name to the bottom of the paper.  I added my kids’ names after I snapped the picture!


Pinterest Pinhttp://pinterest.com/pin/40391727879428291/

Inspiration http://happeningsoftheharperhousehold.net/2010/10/hand-print-spider-halloween-card/

Time:  20 minutes


Sophie’s Candyland 5th Birthday Party September 28, 2012

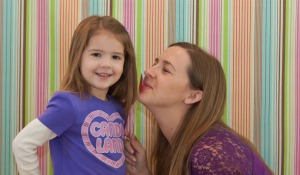
I know it’s been FOREVER since my last post.  Once you read this post, you will see what I’ve been up to.  I’ve been working really hard on finalizing the details of Sophie’s Candyland birthday party.  To plan this party, I used Pinterest to “pin” a bunch of ideas.  I sorted through my pins and decided which ideas to use.  I did come up with a few original ideas, too!  I took the game board and made stations for each stop along the rainbow trail.  The party was a lot of fun!  I hope you enjoy reading about the party as much as I enjoyed putting it together!  The party has come and gone now, so here’s a peak at the details.
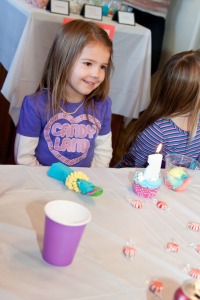
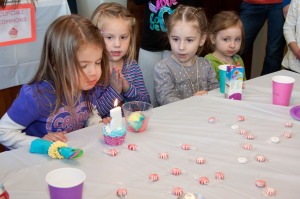
Singing Happy Birthday to Sophie!

DECORATIONS

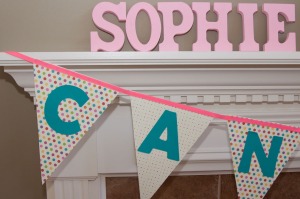
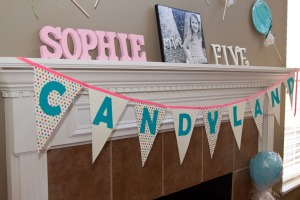
I made a pennant banner that read “Candyland”.  I cut out triangles from scrapbook paper and used my brand new Silhouette Cameo to cut out the letters.  I hot glued the banner to ribbon and taped it on the fireplace.
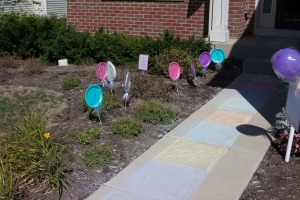
I made some fun paper plate lollipops.  To make these, I glued wooden dowels (from Hobby Lobby) to paper plates.  Then, I wrapped the plates in cellophane and tied it with ribbon.  We placed some of these plates in “Lolly’s Lollipop Woods” (the front yard) and taped some to the walls in the house.
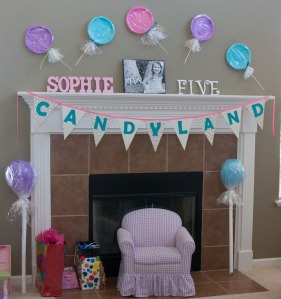
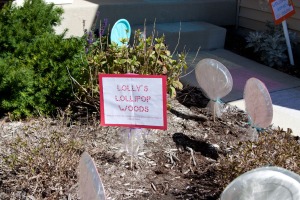
I had some wooden letters that spelled out “SOPHIE” and “FIVE”.  I placed these on the mantle of the fireplace along with a canvas photo of Sophie.  The lollipop plate decorations and banner completed the design.
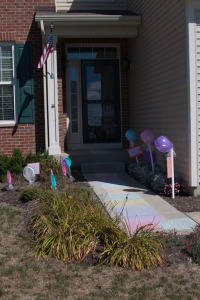
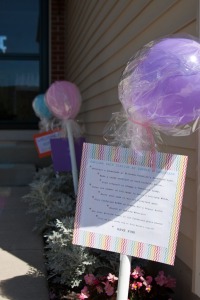
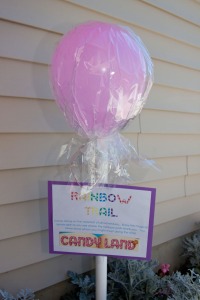
We decorated the front walkway and inside of the house with balloon lollipops.
 

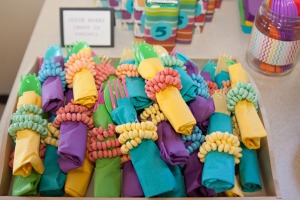
I wrapped the plasticware in napkins and used candy necklaces as a napkin ring.
FOOD

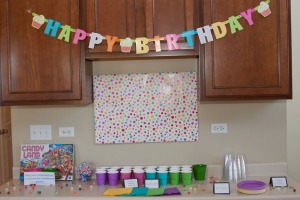
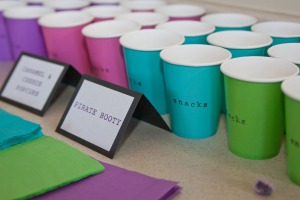
I served pirate booty and caramel/cheese popcorn in these “snack” cups.  I dressed up these plain paper cups from Walmart with my alphabet stamps.  The cups read “snacks”.  I used leftover gumdrops and sprinkled them all over the snack station.
 

DESSERT

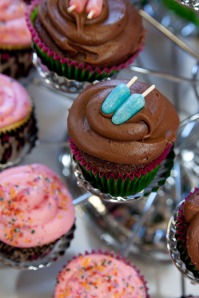
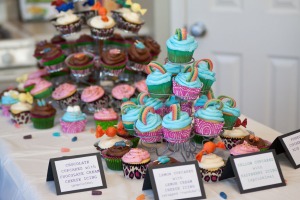
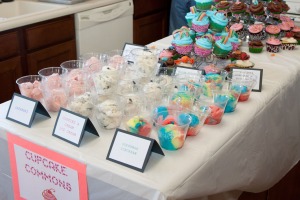
We labeled the dessert area “Cupcake Commons”.  I made four varieties of cupcakes for the party.

1 – Chocolate cupcakes with chocolate cream cheese icing ~ topped with “popciles” made of Mike ‘n Ike’s and toothpicks.

2 – Lemon cupcakes filled with lemon curd and topped with lemon cream cheese icing ~topped with styrofoam wrapped “candies”.

3 – Funfetti cupcakes topped with canned blue icing ~ topped with rainbow airheads.

4 – Yellow cupcakes with raspberry flavored buttercream icing ~ topped with sprinkles.
   

I purchased three types of ice cream.  Sophie’s favorite is Superman.  I also served cookie’s and cream and raspberry sherbert with sprinkles.
LABELS

I created labels for the snacks, cupcakes, ice cream, drinks, and candy table.  I printed the labels on regular printer paper and made a tent out of black cardstock.  See picture above!

DRINKS

I found cute cupcake Duct tape at Target to decorate the water bottles.  No picture, sorry!

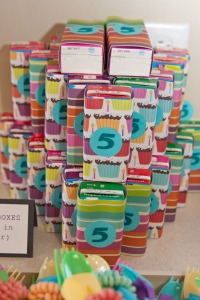
I wrapped the juice boxes in scrapbook paper and affixed a #5 that I cut out on my Cricut.    I pulled off the straws before wrapping the juice boxes, and used a glue dot to re-affix the straw to the back of the juice box.
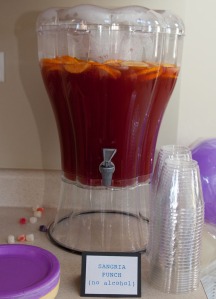
I filled my beverage dispenser with a Sangria Punch.  I filled the cooler with water, pop, and extra juice boxes.
GLOPPY’s CHOCOLATE SWAMP

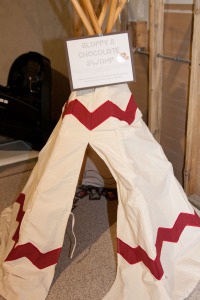
I tossed some fun-sized M&M’s into my girls’ teepee and labeled it “Gloppy’s Chocolate Swamp”.
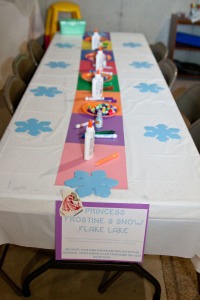
PRINCESS FROSTINE’S SNOWFLAKE LAKE

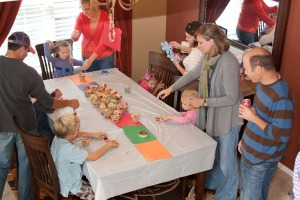
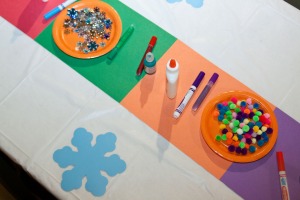
I setup a table where the kids completed a snowflake craft.  I purchased paper snowflakes (from Hobby Lobby).  The kids decorated the snowflakes with sequins, bells, glitter glue, markers, puffy paint, pom pom balls, etc.  I covered most of the tables with white table clothes and lined the middle of the table with a construction paper rainbow trail.
 

LORD LICORICE’S FOREST

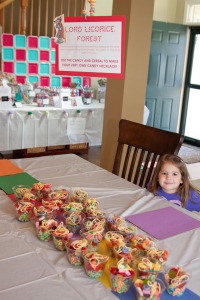
Lord Licorice’s Forest was setup at the dining room table.  I prepared cups of candy and fruit loops so the kids could make their own candy necklace.
 

GRAMMA NUT’S PEANUT ACRES

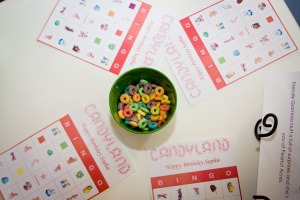
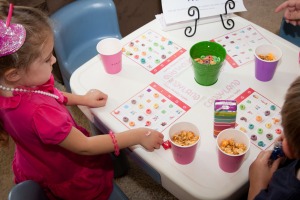
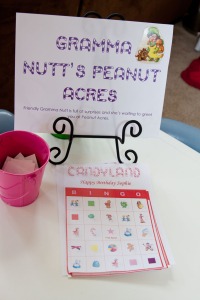
Sophie is allergic to peanuts, so I made Gramma Nut’s Peanut Acres into a BINGO station.  I found a shop on Ebay that was selling a Candyland Bingo game.  The kids really enjoyed this station.
   

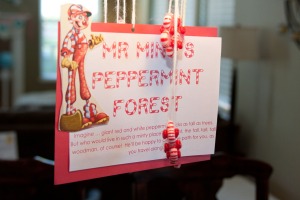
MR. MINT’S PEPPERMINT FOREST

I made some peppermint ornaments to hang over the kitchen table.  Originally, the party was going to be outside and these were to be hung from the patio table umbrella.  We covered the table with a tablecloth and sprinkled peppermints and lifesavers over top of it.
 

RAINBOW TRAIL

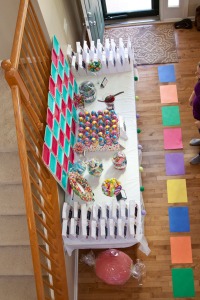
I had my sister (thanks Cindy) color a rainbow trail with chalk along the front walkway leading up to the front door.  There was also a rainbow trail made of construction paper all over the foyer and kitchen.
   

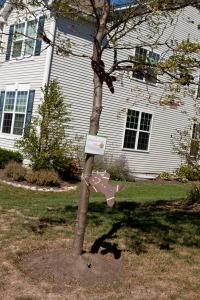
GINGERBREAD TREE

I made a bunch of gingerbread men out of foam and decorated them with pom poms.  I decorated both sides so these guys could hang from the front tree.  I used tacks to hang a sign from the tree.
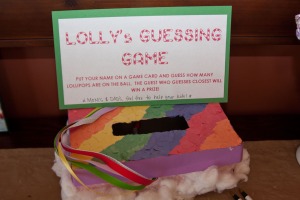
LOLLY’S GUESSING GAME

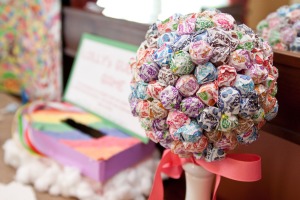
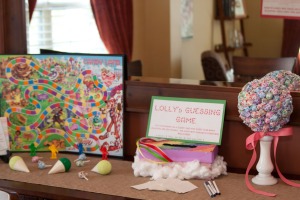
I created “Lolly’s Guessing Game”.  Each kid guessed how many lollipops were on the ball.  The closest guess won a miniature version of the decoration as their prize.  The kids wrote their guesses on cards from the Candyland game.  The guesses were placed in a shoe box decorated as a rainbow (from last valentine’s day).  The total number of dum dums was 165, and one lucky girl guessed 168.
   

GUMDROP PASS

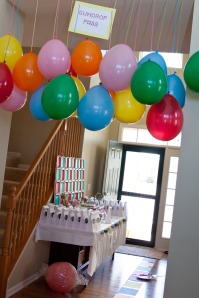
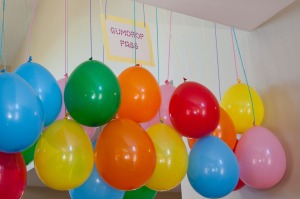
I hung balloons upside down in a doorway and labled it “gumdrop pass”.
 

DRAWING FOR THE CANDYLAND GAME

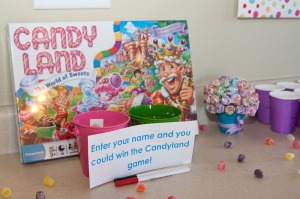
I had everyone enter their names to win the Candyland game.  There was one lucky winner who went home with the game!
PHOTOBOOTH

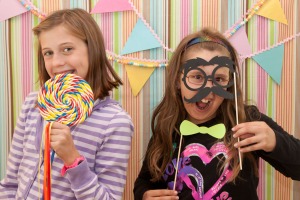
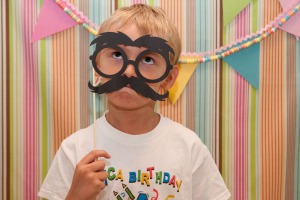
My sister is a photographer and she contributed a Candyland themed photobooth.  We set this up in the upstairs hallway.  The kids LOVED getting their pictures taken with all the fun props.  This may have been the best part of the party!!
   

GOODY BAGS

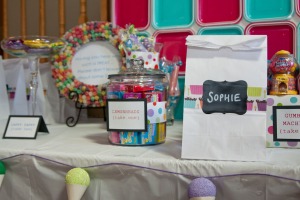
As the party favor, each kid received one empty goody bag labeled with their name.  At the end of the party, the kids filled up their bags with the items displayed on the candy table.

To make the goody bags, I purchased plain white lunch bag sized bags.  I cut a strip of scrapbook paper and glued it to the bag.  Then, I used my Cricut to cut out chalkboard contact paper name tags.  (This was the very last project I will ever do on my Cricut because I’m replacing it with the Silhouette Cameo.  RIP Cricut, you have been good to me.)  I affixed the contact paper to the bag and wrote each guests name with a white chalk marker.
KING KANDY’s CANDY TABLE

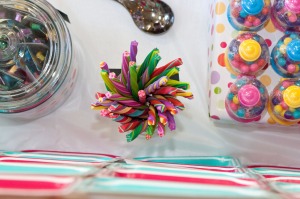
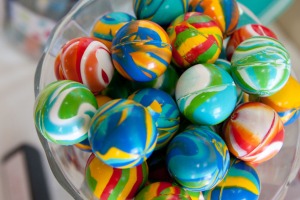
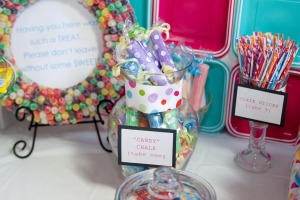
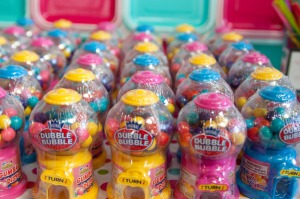
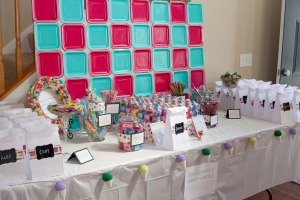
Each item on King Kandy’s Candy table was labeled.  I really tried to find goodies that I could make look like candy so the table wasn’t entirely candy.  I purchased large pieces of polka dot decorated chalk (from Michaels).  I wrapped cellophane around the chalk and tied each end to look like a piece of taffy.  I purchased bouncy balls from Target and made these the “gum” balls.  I purchased some fun erasers that looked like candy sticks (also from Michaels).  I did have some candy on the table too, including lemon heads, gummy bears, mini gumball machines, laffy taffy, and pixie sticks.  I also had a jar of toothbrushes.  The sign read “Make sure to brush those teeth after a fun day at Sophie’s Candyland!”
     

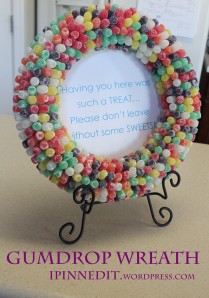
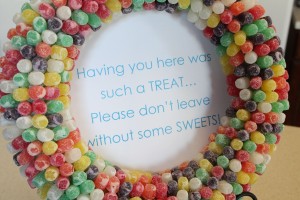
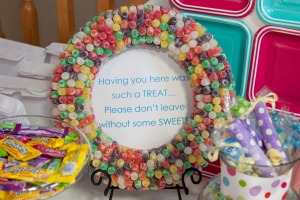
There was a gumdrop wreath on the candy table.  In the center of the wreath, I included a message that read “Having you here was such a TREAT, please don’t leave without some SWEETS!”
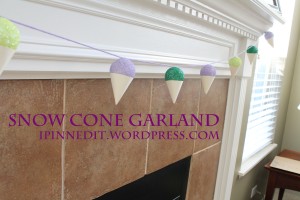
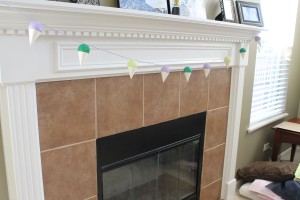
I hung a snow cone garland from the candy table.  I created a backdrop made of square paper plates from Target.  I had some foam boards and I glued on the paper plates to create the backdrop.  I think it turned out pretty awesome!
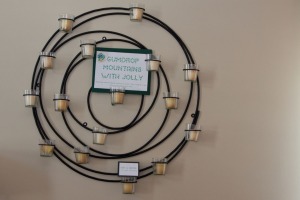
GUMDROP MOUNTAINS WITH JOLLY

Well, due to rain and wind, we had to move the party inside.  We were going to have a bounce house in the backyard which would have been Gumdrop Mountains with Jolly.  I hung the sign over the cooler instead.  Not as much fun, but Jolly was still represented!
A HUGE THANKS TO MY SISTER CINDY WHO HELPED SETUP THE PARTY.  SHE ALSO TOOK ALL THE PICTURES AND SETUP THE PHOTOBOOTH!!!!  THANKS TO MY MOM WHO HELPED ME PUT TOGETHER SOME LAST MINUTE DECORATIONS.  LOVE YOU GUYS!!!!



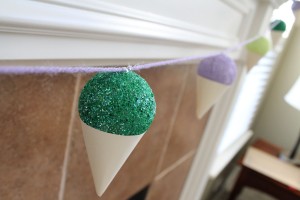
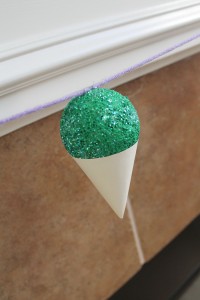
Snow Cone Garland – Perfect for Candyland or Sweet Shop Party August 28, 2012

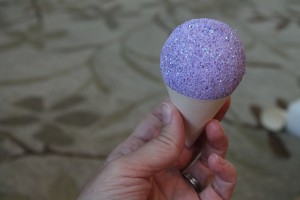
Another decoration I made for the Candyland party is this precious snow cone garland.  I’m going to hang it from the mantle of my fireplace and place the gifts below it.  I plan to take apart the garland after the party and use the individual snow cones to decorate wrapped gifts!


Supplies:

1)       1.5 or 2″ styrofoam balls.

2)      Acrylic paint

3)      Scrapbook paper

4)     Paper Cone Template

5)     Scissors

6)     Glue gun

7)     Paint brush

8)     Toothpicks

9)     Styrofoam block – to hold balls while they dry.

10)  Clear glitter

11)   Yarn


Steps:

(1) Collect all of your supplies.

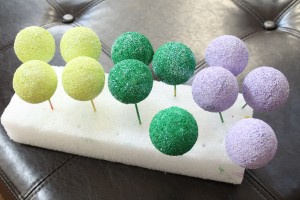
(2) Place toothpicks into each styrofoam ball.

(3) Use brush to paint each ball with acrylic paint.

(4) Insert balls into styrofoam block to dry.


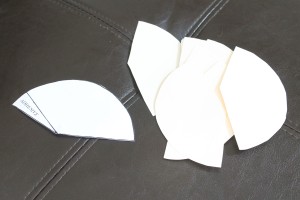
(5) Cut out as many paper cones as you need using the template.


(6) Warm up your glue gun on the LOW setting.  If you use high, your fingers will burn.

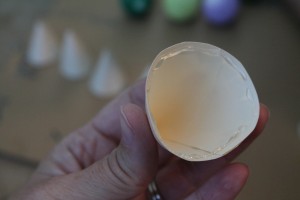
(7) Create a cone shape and glue it together.  Repeat until you have enough cones.

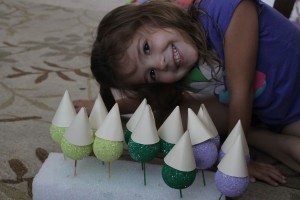
(Note:  Once Sophie placed all the cones on the balls like so, I thought these would work good for a Circus themed party as clowns).


(8)  Place a ring of glue on the inside of the upper portion of the cone.


(9) Quickly insert painted styrofoam ball in place.  Repeat for all cones.


(10)  Measure out the amount of string or yarn you need.

(11)   Start gluing the the top of each ball directly to the yarn or string.

(12)  Allow the glue to dry for a few minutes and you are all done!
 

Inspirationhttp://www.creaturecomfortsblog.com/home/2012/6/5/diy-faux-snow-cone-party-garland-gift-embellishment.html

Pinterest Pin: http://pinterest.com/pin/40391727879062491/

Time:  20 minutes to paint 12 2″ balls, plus 25 minutes for the rest of the project.


Gumdrop Wreath for Candyland Party

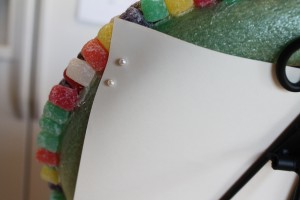
I made this cute gumdrop wreath for Sophie’s Candyland party.  It was a very simple project.  All you need is a foam wreath, a few bags of gumdrops, and hot glue.  Make sure to use the “low” setting on your glue gun or you might end up with some burns!  I didn’t glue the gumdrops all the way around the wreath because I’m going to display it on King Kandy’s Candy Castle table with all the sweets.  Check out the fun sign that I placed inside the wreath.  I used a few sewing pins to attach the sign to the wreath.


Pinterest Pin: http://pinterest.com/pin/40391727879062281/

Inspirationhttp://www.thoughtfullysimple.com/sweet-shoppe-candy-themed-party/

Time:  45 minutes max!


Family Footprints in Sand 2012 August 26, 2012

Filed under: Good Ideas,Kid Projects — ipinnedit @ 9:24 pm
Tags: , , ,

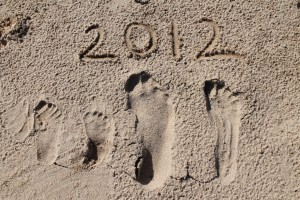
I got this idea from Pinterest, of course!  While visiting our land this summer, my family took a photo of our footprints in the sand on our lot.  We plan to hang this photo on the wall of our lake house when we build in a few years.  It will be a nice way to remember how big the girls were when we first bought the land!  From LEFT to RIGHT:  Sophie (4.5), Molly (2), JR (32), Lisa (32).


Rainbow Cupcakes

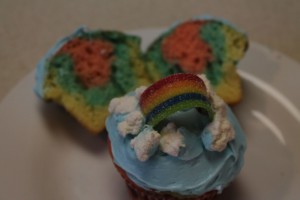
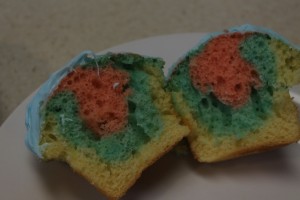
I’ve been wanting to try these cupcakes for a long time.  Aren’t they adorable?  I want to make these rainbow cupcakes for my daughter’s Candyland birthday party, but I wasn’t sure if the rainbow airhead would actually stay in an arch once placed on the cupcake.  The candy is very flimsy, so I wasn’t sure how they would turn out.  To my surprise, these worked out great.  I made a box of yellow cake and divided it into four bowls.  I added food coloring to each bowl and scooped one spoonful of each color to make each cupcake.  The colored batter was a fun surprise for the kids, very rainbowesque (yes, I’m making up words).  I’m definitely going to make these for the party.  Oh, and I was lucky enough to find some Funfetti canned icing that was already blue.  It saved me some time!


Pinterest Pinhttp://pinterest.com/pin/40391727879048318/

Sourcehttp://monicajoy.tumblr.com/post/1264292112/late-post-but-i-finally-made-rainbow-cupcakes

Substitutions:  I used marshmallows for the clouds instead of icing.