ipinnedit

My blog details all the fantastic "pins" I've actually made! Enjoy!

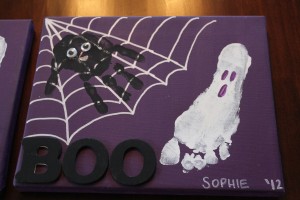
DIY Halloween Spider Hand Print and Ghost Foot Print Canvas October 30, 2012

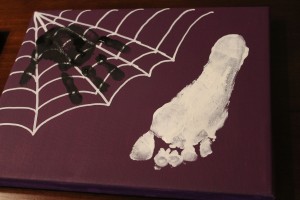
A friend of mine created some Halloween canvas art using her son’s hand print and foot print.  I’ve seen this project posted on Pinterest, too.  She did two separate pieces of art (one hand print spider and one foot print ghost).  Since I only had one canvas per child, I decided to combine the spider and ghost on one canvas.


Supplies

1.)  Canvas – any size that will fit a hand print and a foot print.

2.)  Acrylic paint – I used purple for the background, white for the ghost, and black for the spider.

3.)  White paint pen.

4.)  Paint brushes.

5.)  Googly eyes.

6.)  Glue

7.)  Wooden letters – optional.


Steps

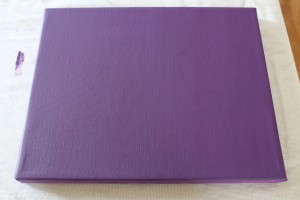
1.)  Paint your canvas in any color you like.  I chose a deep purple.  I ended up doing 6 layers of paint to get a good background.


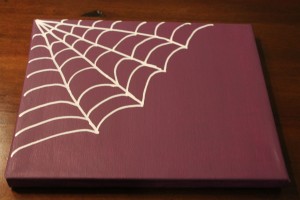
2.)    Draw a spider web using the white paint pen.


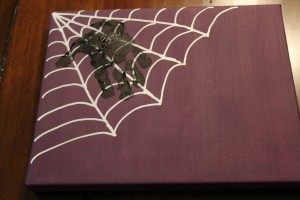
3.)  Using a foam paint brush, paint your child’s hand black and stamp it on top of the spider web.  Make sure to paint on a good thick layer of paint and stamp immediately for best results.  It’s helpful to have a second adult on hand to quickly whisk away your child to clean off their hands and feet.


4.)  Using a foam paint brush, paint your child’s foot white and stamp it on the canvas.


5.)  Allow time for the ghost and spider to dry.

6.)  Glue googly eyes on the spider and paint on a mouth.

7.)  Paint eyes and a mouth on the ghost.  I used purple, but black would look good, too.

8.)  Personalize the artwork by writing your child’s name and year at the bottom.

9.)  Use a paint pen to write “BOO” or “EEK” somewhere on the canvas.  I didn’t trust my handwriting, so I painted some wooden letters black and glued them on.


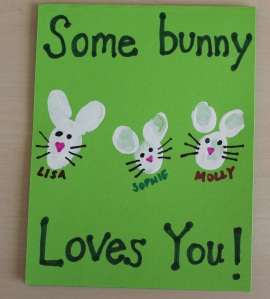
Some Bunny Loves You Card June 8, 2012

I pinned this idea a while back and decided to use if for Father’s Day this year.  We each stamped our finger prints on the card to create three bunnies.  This was a simple, fun, inexpensive, and thoughtful card to create.  I also love that this card is very versatile.  You could use it for Father’s Day, Mother’s Day, a birthday, really for any occasion.


Supplies:

1.)  Cardstock

2.)  Paper cutter or scissors

3.)  Markers

4.) White acrylic paint

5.)  Father’s Day Questionnaire – click here to see the questionnaire I replicated.


Project Steps:

1.  I folded a 8-1/2″ x 11″ piece of cardstock in half.

2.)  I cut the folded piece of cardstock in half.

3.)  I wrote out “Some bunny love me!” on the card, leaving room for the fingerprint art.

4.)  I typed up a Father’s Day Questionnaire and taped it inside the card.

5.)  I interviewed my four-year old about her dad and wrote in her answers.

6.)  I poured just a little bit of white acrylic paint into a paper bowl.

7.)  I stamped each girls thumb and index fingers to create the bunnies.

8.)  After the bunnies dried, I used markers to draw in the eyes, nose, and whiskers.  I also wrote our names underneath the bunny we each stamped.

9.)  I will let my daughter’s draw something on the back of the card and I’ll write a nice message inside.


Pinterest Pinhttp://pinterest.com/pin/40391727878492598/

Project Link:  http://familyfun.go.com/crafts/thumb-bunny-card-662916/

Time: 20 minutes


– Lisa


Rainbow Rice Garden April 24, 2012

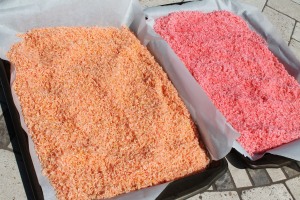
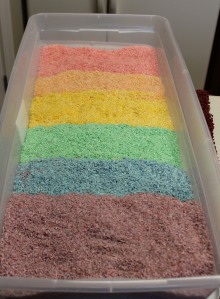
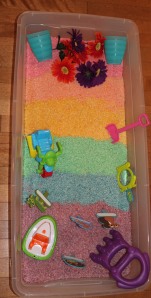
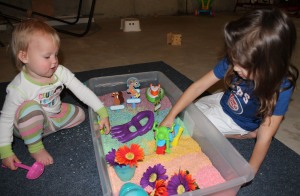
My girls love their new rice garden.  I put this together for my 20 month old, but my 4 year old loves it just as much!  They played with it for over an hour!  This was a simple project, just a little time consuming to color all the rice.  If I’d had more than two baking sheets, it would have gone faster.  Also, I had no idea how much rice I needed, so I ended up going back to the store for more.  I ended up with 20 pounds of rice (8 cups each color for 6 colors).


Supplies

1.)  I used 20 pounds of white long-grain rice!!!

2.)  Food coloring

3.) Rubbing alcohol

4.) Ziploc bags

5.) Parchment paper

6.) Baking sheets

7.) Large plastic storage bin.

8.) Toys for the garden


Steps

1.)  Measure 8 cups of rice for the first color and pour into a gallon size ziploc bag.


2.)  Add as much food coloring as your heart desires.


3.)  Add 5 T. rubbing alcohol.


4.)  Shake up the rice until evenly colored.  If you don’t like the color, adjust by adding more food coloring.


5.)  Line a baking sheet with parchment paper.


6.)  Pour colored rice into baking sheet.


7.)  Let rice dry.  It dries very fast outside on a sunny warm day!


8.)  Repeat for each color.  Save time by using as many baking sheets as you have!


9.)  Pour dry rice into the plastic bin, creating a rainbow.


10.)  Add toys.


11.)  Take a quick picture before your kids destroy the pretty rainbow.


12.)  Let the kids play.


Pinterest Pin: http://pinterest.com/pin/40391727878261028/

Project Linkhttp://shareandremember.blogspot.com/2011/06/rainbow-rice-garden-sensory-play.html

Substitutions:  The project suggests to use liquid water colors.  I don’t have any liquid water colors, so I used good ole food dye.  It worked out just fine.  Also, I used 8 cups of rice per color instead of 4 cups.  I decreased the amount of rubbing alcohol to 5 T. per 8 cups vs the 3T for 4 cups.  The project also says to use 2T of food coloring.  That would be way too much using the dye that I used.  Maybe the 2T was suggested for the liquid water colors.


Paper Plate and Clothespin Rainbows

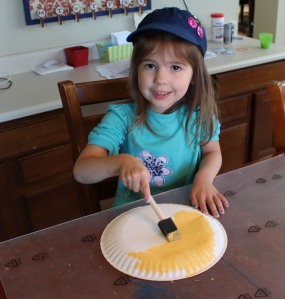
This was a super cute and fun project for my 4-year old.  She could handle every step of this project and she really enjoyed it! I think this might be a project we will do during my daughter’s Rainbow/Candy Land themed birthday party!


Supplies

1.) Paper plate

2.) Clothespins

3.) Yellow Paint

4.) Paint brush

5.) Construction Paper

6.) Scissors

7.) Glue

8.) Googly eyes

9.) Marker


Steps

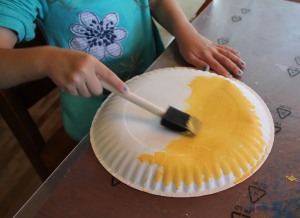
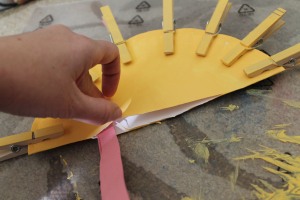
1.)  Paint the outside of a paper plate yellow.


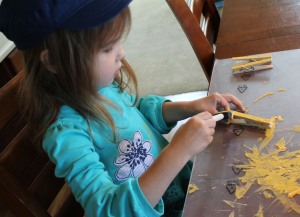
2.) Paint both sides of the clothespins yellow.


3.)  Cut two stripes of construction paper for each color of the rainbow.  Sophie wanted to substitute pink for red!


4.)  Once the paper plate is dry, fold it in half.


5.)  Unfold the paper plate, and cut a slit in the plate on the fold line.  Cut the slit to give you just enough room to glue in the construction paper.


6.)  Refold the plate.


7.)  Pin the clothespins around the plate.


8.)  To get a curly look to the construction paper, we wrapped each piece around a pencil and held it for a few seconds.


9.)  Glue the two pieces of each color together at the top only.  Then, glue inside the plate.


10.) Repeat for each color.


11.)  Finish off the project by adding googly eyes and drawing on a face.  We punched a hole at the top and threaded yarn and hung it from a light fixture above or dining room table.


Here is the face Sophie drew …


And on the other side, I drew a  face …


Pinterest Pinhttp://alittledelightful.blogspot.com/2011/07/craft-days.html

Link to Projecthttp://alittledelightful.blogspot.com/2011/07/craft-days.html

Substitutions:  The original pin looks like they used something other than construction paper.  I used construction paper because that is what I had.  I could see using streamers, ribbon, curling ribbon, etc.

Time:  We painted the plate one evening and finished the project the next morning.  It is a pretty quick project if you don’t count the drying time.


I submitted this project to “Made by you Monday” at Skip to My Lou!  Mine is #430!

Linked up to Six Sister’s Stuff (#261) on 5/12/12.