ipinnedit

My blog details all the fantastic "pins" I've actually made! Enjoy!

Paper Plate and Clothespin Rainbows April 24, 2012

This was a super cute and fun project for my 4-year old.  She could handle every step of this project and she really enjoyed it! I think this might be a project we will do during my daughter’s Rainbow/Candy Land themed birthday party!


Supplies

1.) Paper plate

2.) Clothespins

3.) Yellow Paint

4.) Paint brush

5.) Construction Paper

6.) Scissors

7.) Glue

8.) Googly eyes

9.) Marker


Steps

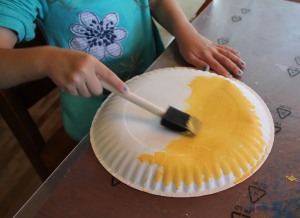
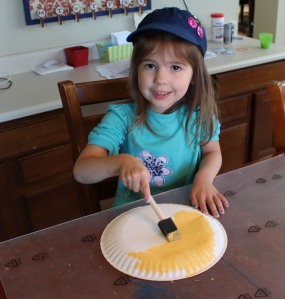
1.)  Paint the outside of a paper plate yellow.


2.) Paint both sides of the clothespins yellow.


3.)  Cut two stripes of construction paper for each color of the rainbow.  Sophie wanted to substitute pink for red!


4.)  Once the paper plate is dry, fold it in half.


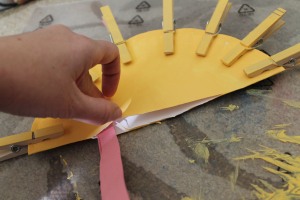
5.)  Unfold the paper plate, and cut a slit in the plate on the fold line.  Cut the slit to give you just enough room to glue in the construction paper.


6.)  Refold the plate.


7.)  Pin the clothespins around the plate.


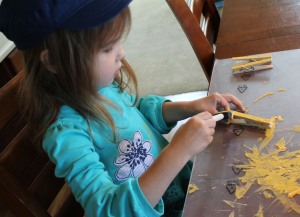
8.)  To get a curly look to the construction paper, we wrapped each piece around a pencil and held it for a few seconds.


9.)  Glue the two pieces of each color together at the top only.  Then, glue inside the plate.


10.) Repeat for each color.


11.)  Finish off the project by adding googly eyes and drawing on a face.  We punched a hole at the top and threaded yarn and hung it from a light fixture above or dining room table.


Here is the face Sophie drew …


And on the other side, I drew a  face …


Pinterest Pinhttp://alittledelightful.blogspot.com/2011/07/craft-days.html

Link to Projecthttp://alittledelightful.blogspot.com/2011/07/craft-days.html

Substitutions:  The original pin looks like they used something other than construction paper.  I used construction paper because that is what I had.  I could see using streamers, ribbon, curling ribbon, etc.

Time:  We painted the plate one evening and finished the project the next morning.  It is a pretty quick project if you don’t count the drying time.


I submitted this project to “Made by you Monday” at Skip to My Lou!  Mine is #430!

Linked up to Six Sister’s Stuff (#261) on 5/12/12.
 

Rainbow Jello for St. Patrick’s Day March 18, 2012

I thought this was so pretty and perfect for a St. Patrick’s Day project.  And oh boy, it was a time-consuming project.  I started the purple jello (bottom layer) at 9am.  The entire thing was ready to eat at 7:30pm.  I probably could have done it faster, but errands, making lunch, other fun projects got in the way of staying on track.  I will say though that you have to be on the ball to get this thing done in one day!  And, make sure to use the quick method (use ice) when making the jello.  The kids loved it!  My 19 month old devoured it!  It was fun to taste all the flavors.  My four year old liked “blue” the best!


Pinterest Pinhttp://pinterest.com/pin/40391727878075324/

Recipe Link http://glorioustreats.blogspot.com/2011/05/taste-rainbow-jello.html


Rainbow Pancakes … St. Patrick’s Day Celebration Begins March 17, 2012

I’ve been keeping this recipe in mind for St. Patrick’s Day.  Since my husband isn’t eating meat on Fridays, I decided that yesterday was the day to make this colorful treat!  These turned out awesome and I will most definitely make them again.


I used the allrecipes “Good Old Fashioned Pancakes” recipe.  This was the recipe suggested in the post.  I considered using my good ole box of Bisquick, but when I looked up the recipe and saw it’s 4.5 star rating with almost 5,000 reviews, I decided to give the recipe a try!  I have to say that these were the best pancakes I’ve ever made.  I considered tossing out my huge box of Bisquick and converting 100% to this recipe!  You really should try it!


I doubled the batter and divided it into 5 cereal bowl.  I colored the batter red, orange, yellow, green and blue!  I used the McCormick Food Color & Egg Dye.  You will use lots of dye, so go ahead and squeeze it in instead of drop it in!  I saved some of the batter (did not color it) so that I could taste the recipe without the influence of the coloring.  The recipe made 4-5 of each color.  I could have got a bit more out of the batter if I scrapped out the bowls, but I knew my family wouldn’t eat all of it anyway!  I kept the cooked pancakes warn in a preheated oven while I finished cooking the remaining colors.


My girls were really excited to eat this special dinner!  My husband really enjoyed them too!  The best part of all this was discovering a new amazing pancake recipe.  Although the recipe is from scratch, it really only takes 5 minutes to prepare!  Bye-bye Bisquick!


Time:  5 minutes to mix the batter, 5 minutes to color the batter, and 15 minutes to cook the pancakes.

Substitutions:  I used McCormick Food & Egg Coloring instead of Wilton coloring.

Pinterest Pin:  http://pinterest.com/pin/40391727878071018/

Rainbow Pancake Link:  http://iambaker.net/rainbow-pancake-sugar-cookies-winnie-the-pooh

Direct Link Pancake Recipe:  http://allrecipes.com/Recipe/Good-Old-Fashioned-Pancakes/Detail.aspx