ipinnedit

My blog details all the fantastic "pins" I've actually made! Enjoy!

DIY Canvas Photo August 16, 2012

My sister recently took a bunch of amazing photos of my two girls.  Molly turned two last week and Sophie will be five next month.  I had two 11 x 14 sized poster photos printed to try a DIY Canvas Photo.  I’m so glad I tried this out.  These turned out awesome and took center stage on my mantle.  I can’t stop staring at them!  I really think the black acrylic paint added a nice finish to these canvas photos.  They really look professional!


Pinterest Pinhttp://pinterest.com/pin/40391727878982693/

Project Linkhttp://www.thegirlinspired.com/2011/07/instant-gratification-canvas-photo-diy.html

Time:  40 minutes hands on time + drying.


Supplies:

1.)  Canvas

2.)  Photos – same size as canvas

3.)  Scrapbook paper – I used black

4.)  Scissors

5.)  Mod Podge – Matte

6.) Sponge paint brush

7.)  Black Acrylic Paint


Steps:

1.)  Cut strips of scrapbook paper to fit the sides of your canvas.


2.)  Mod podge one side of the paper strip and apply to your canvas.  Then, apply a top coat of mod podge.


3.)  Apply a layer of mod podge to the top of the canvas and glue on your photo.


4.)  Allow to dry completely.


5.)  Apply a layer of mod podge all over the top of the photo and sides of canvas.


6.)  Allow to dry again.


7.)  I used the same sponge brush and blotted on black acrylic paint around the boarder (I filled in any space the scrapbook paper didn’t cover up).


8.)  Allow to dry and you are done!


I have dreams of a gallery wall in my upstairs hallway, and know I have inspiration to get it started!


Use a Glass Cookie Jar for Salads June 2, 2012

I thought this was a brilliant idea.  It looks classy and it can be used outdoors to keep the bugs off your food!  There were two sizes available at my local WalMart.  I picked up three of the smaller size and one of the larger size (which I didn’t use).  I was too busy serving the food that I forgot to take a picture with these filled.  Maybe next time!  I decorated these for Mother’s Day.


Pinterest Pinhttp://pinterest.com/pin/40391727878457095/

Inspirationhttp://www.4men1lady.com/2011/07/backyard-bash.html


Days of the Week Kitchen Towels and Washclothes

I cannot find the pin that inspired this project, so please let me know if it’s you so I can give you proper credit!


One thing I use a lot of is paper towels.  When I saw this pin, it motivated me to create these adorable day of the week rags and towels.  One thing that grosses me out is old smelly dish rags.  I thought these day of the week rags were the perfect idea to stay on track.  At the end of each day, I will toss them in the laundry and start fresh each morning.  Perfect!  No gross old rags laying around and I will certaintly use less paper towels!


Supplies:

1.)  Kitchen Rags – I purchased at Target

2.) Flour Sack Towels – I purchased mine at Target

3.) Heat ‘n Bond Iron On Adhesive – I purchased mine at JoAnn’s

4.) Fabric

5.)  Cricut Machine

6.)  Scissors

7.)  Sewing Machine and Thread

8.)  Iron


Steps:

1.)  Collect supplies.


2.)  Cut 14 (3″ x3″) squares of each the Heat ‘n Bond and fabric.


3.)  Follow instructions on Heat ‘n Bond package to adhere the fabric to the adhesive.


4.)  I used my Cricut machine to cut out the letters of the week.  I cut 2″ letters on the 3″x3″ squares.


5.)  I warmed up my iron and peeled off the back layer of the adhesive.


6.)  I ironed on the letters to my rags and towels.


7.)  For the last set, I used my sewing machine to sew on the letters.  I have to admit, I’m not 100% sold that these letters will stay on the rags and towels.  I will update this post in a month or so to let you know how they are holding up.  I remember reading in the original pin I saw that after a few washings, they start to look frayed and kind of have a vintage feel to them.  We will see …


And here they are in my kitchen drawer ready to go!


– Lisa


Yarn Balloon Eggs April 7, 2012

I saw this pin long ago and it sparked my interest in having a rainbow / Candy Land themed 5th birthday party.  I thought these yarn balloons would be a perfect decoration for her party.  Since then, I learned that I can use this technique to make Easter egg shaped yarn balloons.  So, I made enough to fill a bowl to use as a centerpiece for Easter.  I’ll do more for my daughter’s birthday, but it’s not until September!


I first tried mixing tacky glue and water and this is was the result …  as my daughter would say waah-waah-waaah.


I knew from the moment I started putting on the yarn that it wouldn’t work. The yarn wasn’t sticking, my fingers were very sticky, etc, etc.  Also, I tried to do this outside and that was a BAD idea.  The wind blew the balloon around too easily.


I was determined to make this work, so I searched Pinterest for a new concoction.  I read of many ways to make the paste used to affix the yarn to the balloons.  I headed to the store with a long list of ingredients.


The first mixture I tried was to mix 1 cup of liquid starch (I used STA-FLO) with 1/2 cup of flour.  To my delight, it worked great.  I was relieved that I wouldn’t have to try any of the other recipes.  Although this project is messy, I loved that the mixture was easy to clean off my hands and my counter top.


Supplies:


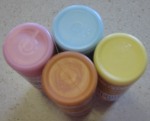
1) Liquid starch (STA-FLO)

2) Water balloons

3) Bowl

4) Yarn

5) Paper Towel or toilet paper rolls

6) Newspaper

7) Scissors


Steps:


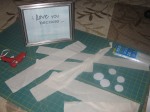
1)  Cover table or counter top with newspaper.


2) Prepare paste.  I combined 1/2 cup of STA-FLO with 1/4 cup of flour.  This amount made three balloons.  I would have made more, but it was all that would fit in my bowl.


3) Blow up water balloon (I had to use a hand pump because it was impossible to blow up with your mouth).


4) Shape balloons by squeezing them into an egg shape.


5) Prepare yarn.  I did not cut the yarn ahead of time.  I just unraveled part of the ball and dropped the ball over the edge of my counter top.  This made it easy for me to pull more yarn as I needed it!  NOTE:  Use any kind of yarn.  I liked the look of the really thin crochet yarn that I had on hand.  You can also use embroidery floss.


6) Place some yarn in the bowl.  I probably placed 3 feet of yarn in at a time.  Be careful not to knot up your yarn.


7) Squeeze out the paste mixture over the top of your bowl (so it drips back in).


8) Wrap yarn all around your balloon.


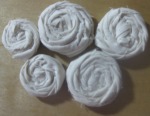
9) Keep wrapping.  Wrap until you have as much yarn as you like.


10)  I cut up some toilet paper rolls and placed my balloons on them to dry.  In the morning, I flipped the balloon over to dry the other side.


11) Once the balloon is completely dry, hold onto the tied part of the balloon and pop it!  MAKE SURE TO HOLD ONTO THE TIED PART OR IT WILL BE REALLY HARD TO GET ALL THE REMNANTS OUT OF THE BALLOON!!!


12) Now admire your balloon.  You will notice there is extra glue on the balloon.  Go ahead and use a pin or paper clip or something to scrape out the existing glue.  I didn’t do this, but you could to have a more finished product!


I’ve read that these can last years and years.  I plan to save mine for next year.  Another fun alternative is to fill the water balloon with a treat or something.  Then, when you pop the balloon, there is a treat inside the balloon.  Then, your kids get to cut open the balloon on Easter for the treat.


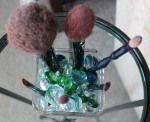
And here is a picture of my centerpiece!


Pinterest Pin: http://pinterest.com/pin/40391727878174891/

Project Linkhttp://www.craftyendeavor.com/2012/03/08/easter-egg-garland/

Time:  It took me about 25 minutes to do three balloons.  To do 6, it would probably take 40 minutes.  It took a bit of time to get it all setup and cleaned up.

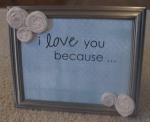
Substitutions:  I did not make these into a garland because I already made the paint chip garland!  Also, I used yarn instead of embroidery floss.  I bet the embroidery floss would work really well, too!


Makeup Brush Storage Vase with Marbles April 5, 2012

The second bathroom (the first was the Tic Tac bobby pin storage) pin I created is this awesome looking makeup brush storage vase with marbles.  It looks really cool and organized!


Supplies:

1)  Shallow vase

2) Marbles / Stones / Etc.

3) Makeup brushes, eye liner, mascara, etc.


I purchased a small shallow vase from Hobby Lobby.  I already had some blue/white/green colored “marbles” that I purchased from IKEA, so I used those.  Ideally, I would have smaller sized round marbles, but FREE is better for now!  I placed the “marbles” in the vase and then placed my makeup brushes in the vase.  At first, I filled the vase to the brim with the marbles, but as I added my makeup brushes, the marbles spilled over.  Overall, it’s a cool decoration for my bathroom and easy to reach for my brushes, but the marbles seem to spill out.  Maybe if I spend some $ on smaller round marbles, I wouldn’t have that problem!


Pinterest Pinhttp://pinterest.com/pin/40391727878162249/

Project Linkhttp://theaveragegirlsguide.com/2012/02/how-to-store-brushes/

Time:  10 minutes

Substitutions:  I used a smaller vase and colored “marbles” I already had from IKEA


Paint Chip Easter Egg Garland March 29, 2012

I’ve seen this idea posted a few times and I thought it was a cute project for Easter.  The best part is, it’s free!  I did feel a little sneaky snatching paint chips at Home Depot the other day.  I was relieved to read that someone actually called Behr and asked if it was considered “stealing” when taking paint chips for crafts.  Behr said that it as NOT stealing!  Phew!


Supplies:

– Paint Chips

– Stencil of Egg

– Pencil

– Scissors

– Tiny Hole Punch

– Crochet Thread

– Tape


Steps:

1.)  I collected paint chips from Home Depot.  I grabbed the Behr paint chips that have four colors.


2.)  I cut my paint chips in half.


3.)  I found a picture of an egg by searching in google for “easter egg template”.  I copied the picture from the internet and pasted it into Word.  Then, I re-sized the image a few times until I got it just the right size.  TipMake sure to get your template just the right size.  If you make it too big, you will cut off some white on to the tips of the eggs.  A few of mine have white tips! 


4.)  I cut out the egg and traced it onto my first paint chip.


5.)  I used my first paint chip as a stencil and traced the egg shape onto all my paint chips.


6.)  I cut out the eggs.


7.)  I punched two holes at the top of each egg (about 1/4″ apart).


8.)  I placed my paint chips in order.  My daughter had fun matching the colors in rainbow order.


9.)  I threaded the eggs onto the crochet thread.  NOTEI did not pre-cut the thread.  I cut the thread after I threaded all the eggs and after I hung it on my mirror.


10.)  I taped my garland to my dining room mirror and spaced the eggs out evenly.


Time:  1.5 hour total.  It took one hour to cut the paint chip, trace the eggs, and cut them out.  It took another half hour to punch the holes and string the eggs.

Pinterest Pinhttp://pinterest.com/pin/40391727878131804/

Link to Projecthttp://blog.amyatlas.com/2011/04/paint-chip-easter-garland-easter-giveawaypantone-egg-contest/

Substitions:  None


I’m excited about all the fun projects I can create out of paint chips.  I plan to use the paint chips to make a similar garland (but with circles) for my daughter’s Candy Land/Rainbow themed birthday party (it’s not until September, but I’m getting started early.)  I’m also going to make my daughter a paint chip necklace!


Also, take a look at my yarn ball eggs (in a white bowl under the mirror).  I’ll be posting about this, too.  I just want to make more of them first!


Happy Easter!


I Love You Because …. Picture Frame March 8, 2012

I got this idea from an incredible blog.  Keri started following my blog and I checked out hers.  Her blog follows her year long adventure of creating pinterest inspired projects.  She posts daily to her blog and it really is incredible.  Check her out at:  http://ipinterest.me/  She posted this “I love you because …” project and I thought it was perfect for JR’s birthday.  I’ll put it on his nightstand and the girls and I could write cute stuff on there to brighten his days.


Pinterest Pin:  http://pinterest.com/pin/12173861462456827/

Keri’s blog post:  http://ipinterest.me/2012/02/29/day-91-get-crafty-simple-daily-message-board-for-the-ones-you-love/

Rosette Pin:  http://pinterest.com/pin/40391727877981866/

Rosette Tutorial:  http://thestewartestate.blogspot.com/2011/12/love-message-board-tutorial.html

Font:  Pea Annalee Script


Project Description:

(1)  Fist, I went shopping for the supplies.  I purchased an 8 x 10 frame, scrapbook paper, muslin fabric, and a piece of felt.  Hint:  Look for paper that isn’t textured (so you can print on it) and isn’t too busy (so you can see your messages).

(2) Since I bought a 12×12 piece of paper, I used my paper cutter to trim it down to 8.5 x 11.

(3) I downloaded the font suggested on the pin.  See above for link to download the font.

(4) I created an 8.5 x 11 psd file in Photoshop Elements.  In the file, I typed  the words “i love you because …”  The word “love” is pea annalee script and the remaining words are Century Gothic font.  I used size 72 font.

(5) I printed the file on my new scrapbook paper and placed it in the frame.

(6) I found a tutorial on Pinterest for rosettes.  A link to the tutorial is listed above.

(7) Once the rosette’s were complete, I affixed them to the frame.

(8) Done!


IKEA Spice Rack Book Shelves February 8, 2012

Filed under: Home Decor — ipinnedit @ 10:17 pm
Tags: , , ,

I saw this pin and thought it was a great idea!  I headed out to IKEA on the hunt for six spice racks.  I prowled the kitchen area of IKEA and could not find these stinkers anywhere!  I finally located someone and asked for help!  The saleswomen told me they were sold out, but then she thought she saw some under the cash register to be re-shelved.  Oh happy day, they were there!  They only had four in stock, but that was much better than none.


I painted them four different colors of acrylic paint that I already had in my collection.  I chose a yellow, pink, blue, and orange.  I installed them myself, too!


Pinterest Pin:  http://pinterest.com/pin/40391727877843862/


Use a Cupcake Holder as an Ornament Centerpiece January 2, 2012

Filed under: Good Ideas,Home Decor — ipinnedit @ 6:35 pm
Tags: , , ,

I thought this was such a great idea! I have a cupcake holder that gets used at best a few times a year. What a great idea to use it as a centerpiece for the holidays. The most time consuming part of this project was locating the cupcake holder. I eventually found it in the way way back dark corner of a kitchen cabinet. I then took a few ornaments off my tree and filled in the cupcake holder. Voila, I had an instant dining room table centerpiece. I decided to sprinkle a few extra ornaments around the centerpiece. This was so simple!


Pinterest Pin: http://pinterest.com/pin/40391727877620334/