ipinnedit

My blog details all the fantastic "pins" I've actually made! Enjoy!

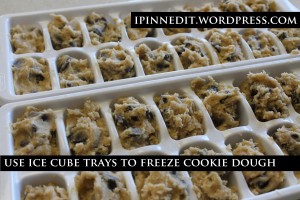
Ice Cube Tray to Freeze Cookie Dough November 12, 2012

I love to bake cookies!  There is nothing better than a freshly baked warm chocolate chip cookie with a glass of milk.  The problem I have with making homemade cookies is that the recipe yields dozens of cookies that I don’t really want to eat up in just a few days.  I’m not a huge fan of cookies that are a few days old.  They just don’t have the same fresh flavor!


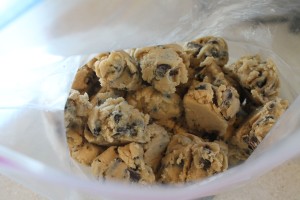
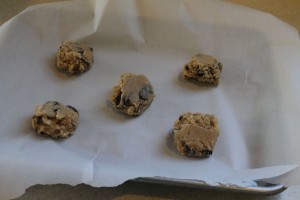
I found a way to make a batch of homemade cookies last much longer!  I saw a pin on Pinterest that gave me the idea to freeze cookie dough in an ice cube tray.  I baked a few sheets of cookies and then spooned the rest of the cookie dough into an ice cube tray or two.  I let the dough freeze for a few hours and then placed the frozen cubes in a ziploc bag.  I stored the bag of cookie dough in the freezer.  Now, when my family is craving cookies, I already have the dough ready to go.  I just added a minute or two to the baking time since the dough was frozen.  I’m very pleased with the results of this experiment!


Apple Cream Cheese Bundt Cake with Caramel Pecan Frosting November 5, 2012

This was probably the BEST cake I’ve ever made.  I will make this again and again and again.  Growing up, my mom made spice cake often.  It was a family favorite.  Well, this cake reminded me of souped up spice cake!  Don’t skip the pecan topping, it really made the cake!  This would be the perfect dessert for Thanksgiving.  It was great with a cup of coffee for breakfast, too!  🙂


Recipe http://www.jamhands.net/2012/09/apple-and-cream-cheese-bundt-cake-with.html

Time:  It took half the day to complete this cake.  As far as prep work, dicing up the apples was the most time-consuming part.  Other than that, the baking and cooling times were long, too.  It was worth it though!

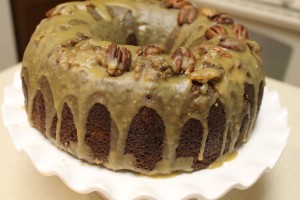
Substitutions:  I baked mine for one hour.  The recipe says to let the cake cool for 15 minutes and then remove the cake from the pan.  I had to wait much longer (an hour) and I still ended up losing some of the cake.  Ugh!  Also, the recipe shows a thick white icing on top of the cake.  The icing actually attracted me to the recipe; however, my icing was more of a glaze.  It didn’t matter because it was so delicious!!!


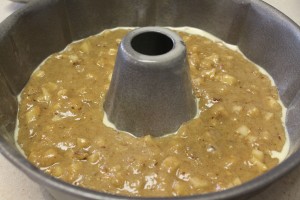
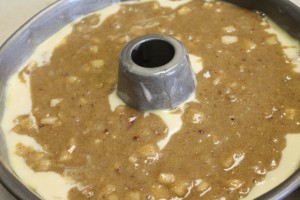
Batter poured into pan. The white you see around the edge, is the “Bake Easy” spray I used to coat the pan.

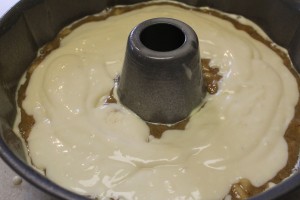
I added the cream cheese mixture. As you can see, I couldn’t keep it an inch away from the sides as instructed in the recipe.

I added the remaining apple batter.

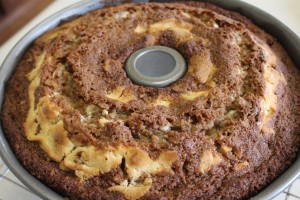
Baked!

Finished cake!

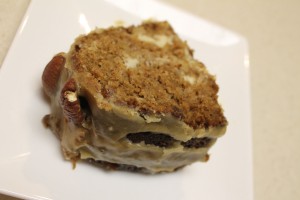
Ready to eat!


Rainbow Lollipop Cookies August 6, 2012

I was attracted to this recipe because I thought these cookies would be perfect for my daughter’s Candyland 5th birthday party.  I thought I could make these cookies and bake them on sticks, so they would look like lollipops.


I’ve made this recipe two times.  The first time, I followed the recipe exactly.  I used the Betty Crocker sugar cookie mix (in a bag).  I had some issues with my first attempt.  First, the sugar cookie dough turned out too sticky for rolling, shaping, etc.  If you do follow the recipe, you will probably have to add some flour to get a better consistency.  Second, the picture on the recipe shows a beautiful good sized cookie.  If you follow the recipe, you will not have enough dough to yield 3 dozen cookies the size they picture.  Third, the cookies turned out thin.

 
I made these a second time with my go-to sugar cookie recipe.  It’s a recipe I got at a Wilton Cookie Blossom class.  I love this recipe because the dough doesn’t change shape when you bake it, it tastes good, you don’t have to refrigerate, and it is perfect for baking cookie blossoms (cookies on sticks). The dough made a huge difference the second time around.  These cookies turned great!  They would taste better with icing, but then you wouldn’t be able to see the pretty pinwheel shape.  I’m relieved that they turned out because they will be perfect for Sophie’s Candyland party next month!


Dough Separated into 5 Equal Sections

Wilton Food Colors – Chosen by the Kiddos

The power of food coloring!

My daughter helped me roll the dough …

Rolled into a log shape.

Ready to bake!

Finished Product! Don’t forget to let them cool!


Rainbow Cookie Recipehttp://www.soudersstudios.com/recipes/rainbow-pinwheel-cookies.php

Wilton Sugar Cookie Blossom Recipe http://www.food.com/recipe/wilton-cookie-blossom-sugar-cookies-82681

Pinterest Pin: http://pinterest.com/pin/40391727878911369/

Time:  1 hour+

Substitutions:  I substituted the Betty Crocker sugar cookie mix for homemade sugar cookie dough!


Yellow Cake Homemade Cinnamon Rolls July 24, 2012

I just returned from a 10 day vacation in Florida.  I spent the time at my parent’s house with my kids, husband, siblings, niece, nephew, and parents.  My sister and I made these together; I thought that was cute considering I found the recipe from the Six Sisters’ website.  There is a lot of waiting time (for the dough to rise), but the recipe is rather simple and the results are heavenly!  The recipe yields 24 cinnamon rolls, (2) 9×13 pans.  It seems like a lot, but they were great leftover, too!  Next time, I’ll prepare the cinnamon rolls the night before, refrigerate, and take them out an hour before baking (to rise) and bake in the morning.  I’ll update this post once I try that out!


Dough – Ready to Rise

The Dough has Risen

The Dough Rolled Out – Not Exactly a Rectangle 🙂

Buttered and Sprinkled with Brown Sugar and Cinnamon

Rolled Up and Ready to Cut

Cinnamon Rolls Baked and Iced

Ready to Eat!


As you can see in my pictures above, I did not roll out the dough in a perfect rectangle.  I just quickly rolled it out.  Any tips on how to get a nice rectangle shape to the dough?  Thanks!


Pinterest Pinhttp://pinterest.com/pin/40391727878820554/

Recipehttp://www.sixsistersstuff.com/2012/07/cake-mix-cinnamon-rolls-recipe.html

Time:  10 minutes prep, 1.5-2 hours for the dough to rise, another 20 minutes prep, and 15 minutes bake time.

Substitutions:  The recipe yields 24 cinnamon rolls (12 in each pan).  We iced one of the pans with the cream cheese frosting when the rolls were still warm, so the icing would melt into the rolls.  We let the second pan cool completely and then iced them.  It was kind of an experiment to see which way tasted better.  I preferred the warm gooey cinnamon roll with melted icing, but they tasted great both ways!  🙂


Candy Cupcake Toppers June 30, 2012

I saw these candy cupcake toppers and knew they would be perfect for Sophie’s Candyland party.  They turned out really cute and were really easy to make!


Supplies:

1.)  Small foam balls.  I got mine at Michaels.  A bag of 16 balls, size 15/16″ cost $3.99.  USE A COUPON to get 40% off!


2.)  Tissue Paper

3.)  Scissors

4.) Glue


Project Steps:

1.)  Cut small pieces of tissue paper.  I used pieces about 4″x3″.


2.)  Place a dab of glue on a foam ball.


3.)  Roll the tissue paper around the ball.


4.)  Secure the tissue paper with a second dab of glue.


5.)  Allow the glue to try for a few minutes.


6.)  Twist each end of the ball.


7.)  Trim the tissue paper down so it looks like a candy wrapper.


8.)  Fluff the ends.


9)  Insert a toothpick into the center of each ball.


Pinterest Pinhttp://pinterest.com/pin/40391727878644165/

Project Linkhttp://cakejournal.com/tutorials/how-to-make-a-candy-cupcake-topper/

Substitutions:  I did tie a few pieces with thread, but then I decided I was wasting time.  Also, I didn’t put glue on the toothpicks.  I just pushed them into the styrofoam ball.  I felt they were secure enough!

Time:  One minute per ball.


– Lisa


Boston Cream Cupcakes – Yum! June 2, 2012

These were the best thing I’ve made in a long long long time.  I almost ate all of them myself.  Now that I’m admitting to that, I realize that I should probably not make these again for a very very very long time.  You should make these yourself and find out how delicious and easy they are!


Steps:

1.)  Prepare yellow cupcakes according to box.

2.) Prepare filling.

3.)  Once cupcakes are cool, use 1/4 teaspoon to scoop out enough of the inside to fill the cupcakes.


4.)  Scoop filling into a ziploc bag or pastry bag and fill cupcakes.

5.)  Smooth the filling on the top of the cupcakes.


6.)  Prepare chocolate ganache.

7.)  Spoon ganache over cupcake and use the backside of the spoon to create a nice smooth topping.


8.)  Refrigerate and enjoy!


Recipe http://www.sixsistersstuff.com/2011/05/boston-cream-pie-cupcakes.html

Pinterest Pin: http://pinterest.com/pin/40391727878456775/

Substitutions:  The original recipe says to cut the cupcake in half.  I was worried the cupcakes would slide around, so I opted to use 1/4 teaspoon to scoop out the insides of the cupcake and then fill.


– Lisa


Banana Walnut Muffins January 24, 2012

Filed under: Baking — ipinnedit @ 11:13 pm
Tags: , , , , ,

Years ago, I had a Green Mountain coffee shop near my house.  Every Saturday I would get a hot chocolate and banana walnut muffin.  I was craving a banana walnut muffin and I had some bananas going old, so I sought out a recipe on Pinterest for banana walnut muffins.  These banana walnut muffins were so yummy and moist.  I did notice that the tops of my muffins sank a bit.  Not sure why.  This recipe was time-consuming, so plan for that!


Time:  40 minutes to get in the oven

Substitutions:  I added 1/4 t. of cinnamon since I didn’t have any cardamom.  I used 2 large bananas instead of 3 small bananas

Pinterest Pin:  http://pinterest.com/pin/40391727877767783/

Recipe:  http://sweetpeaskitchen.com/2011/09/20/banana-walnut-muffins/


Canned Biscuit Cinnamon Sugar Donuts! Yum!

Filed under: Baking,Cooking — ipinnedit @ 10:57 pm
Tags: , , , , ,

I love fall because all the pumpkin farms sell my favorite apple cider donuts.  I was drawn to this recipe because I thought these cinnamon sugar donuts looked similar to the apple cider donuts.  It turns out they don’t taste like them, but that was expected!  These donuts were soooo easy, sooo fast, and sooo delicious.  My two daughters and I love them.  We will see what my husband thinks when he gets home (if there are any left).  I should note that they cook pretty fast.  I cooked the second side a bit too long, so make sure to pay attention.  One great thing about this recipe is that the only thing I had to purchase was the biscuits.  The rest of the ingredients are staple items found in most families pantries!  Also, this is a fun recipe to make with kids.  My 4 year old had fun cutting the holes in the biscuits and dipping in the sugar!


Update:  My husband said they were the best donuts he’s ever had!


Time:  18 minutes total!  I should deduct a minute or two for the time spent getting my daughter up from her nap.

Substitutions:  None

Pinterest pin:  http://pinterest.com/pin/40391727877767720/

Recipe:  http://www.littlebitfunky.com/2011/11/what-i-made-for-monday-naughty-donuts.html